 ████  █████  ████  ████  ██  ██     ████   █████
██░░██ ██░░██  ██░░██░░██ ███ ██░   ██░░██ ██░░░░░
██░ ██░█████░░ ██░ ██░ ██░██████░   ██░ ██░ ████
██░ ██░██░██░  ██░ ██░ ██░██░███░   ██░ ██░  ░░██
 ████░░██░ ██ ████  ████░░██░ ██░    ████░░█████░░
  ░░░░  ░░  ░░ ░░░░  ░░░░  ░░  ░░     ░░░░  ░░░░░
open source OS for the stars
A tiny, fast embedded Linux for the Raspberry Pi 2 Model B and a 3.5" SPI touchscreen. It boots straight into a touch UI with a big clock, weather, a swipe launcher and ORION AI. No desktop, no X11, no bloat.
status
features
ASCII boot splash
No kernel spam. The ORION logo and a progress bar appear on the TFT from the first second, then fade into the UI.
Clock + weather
A huge clock with 12/24 h, seconds and date, and Open-Meteo weather that is cached for offline use. Tap the logo to talk to ORION AI.
Swipe launcher
Home → AI → Weather → Terminal → Files → System → Settings, then back to Home. Animations are tuned for SPI speeds.
ORION AI
An offline step-by-step equation solver, calculator and summarizer. It can also use a local llama.cpp server or the Claude API, only if you opt in for that host.
First-boot wizard
Language, display and touch calibration, Wi-Fi, time zone, weather city, device name, SSH and AI, all from the touchscreen.
Read-only root
The system partition is never written at runtime, so power cuts can't break it. Settings live on a separate /data partition.
screenshots
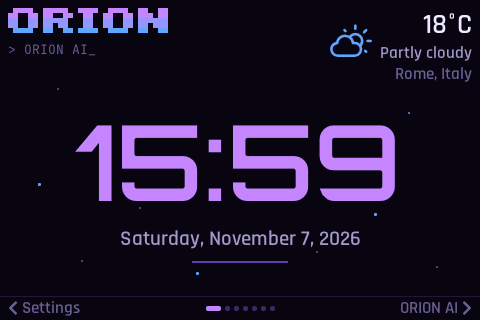
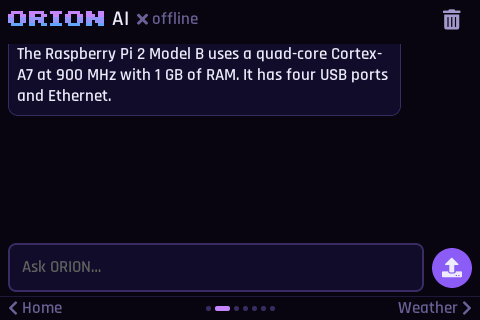
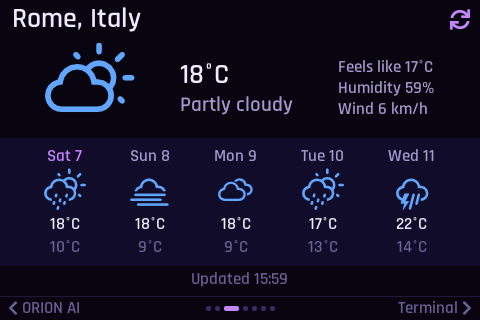
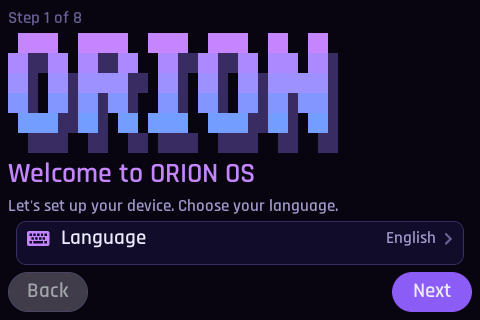
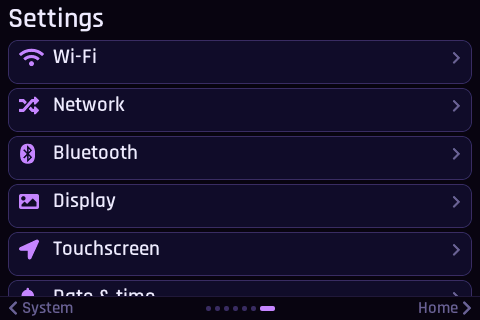
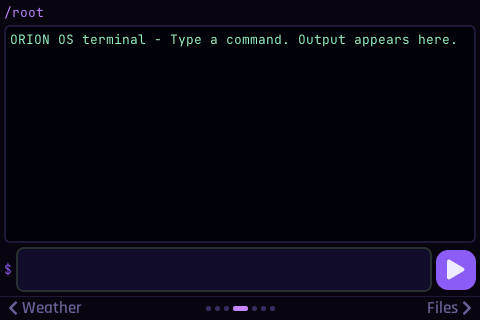
Rendered by the headless UI simulator at the panel's native resolution. Portrait (320x480) is supported too.
download
Always check the SHA-256 checksum before flashing. The source is MIT licensed; third-party parts keep their own licenses.
installation
-
Get the hardware
A Raspberry Pi 2 Model B, a 5 V / 2 A micro-USB supply, a microSD card of 1 GB or more (8 GB+ recommended) and a 3.5" SPI TFT HAT (Waveshare "3.5inch RPi LCD (A)" type: ILI9486 + XPT2046). The Pi 2 has no Wi-Fi: use Ethernet or a supported USB Wi-Fi adapter.
-
Download and verify
$ wget https://orionos.orbitastudios.eu/downloads/orion-os-0.1.0-rpi2.img.xz
$ wget https://orionos.orbitastudios.eu/downloads/orion-os-0.1.0-rpi2.img.xz.sha256
$ sha256sum -c orion-os-0.1.0-rpi2.img.xz.sha256
orion-os-0.1.0-rpi2.img.xz: OK
-
Flash the SD card
Easiest: in Raspberry Pi Imager or balenaEtcher, choose Use custom and pick the
.img.xzfile; they decompress it themselves. Linux CLI (check the device withlsblkfirst, because this overwrites the whole card):$ lsblk # find your card, e.g. /dev/sdX $ xz -dc orion-os-0.1.0-rpi2.img.xz | sudo dd of=/dev/sdX bs=4M conv=fsync status=progress
-
Optional: choose your display before first boot
The default is a 3.5" (A)-type panel in landscape. To change it, open
config.txton theORIONBOOTpartition and edit only the managed block:# >>> orion-display (managed) # profile=tft35a dtoverlay=orion-tft35a,speed=24000000,rotate=0 # rotate=90 → portrait # <<< orion-display
Other profiles:
dtoverlay=piscreen,drm,…(OzzMaker PiScreen),dtoverlay=pitft35-resistive,…(Adafruit PiTFT 3.5"), or remove the line for HDMI only. You can change all of this later in Settings › Display. -
Optional: headless preseed
Create
orion-preseed.txton the boot partition to skip typing on the touchscreen. ORION imports it on first boot and then deletes it from the card, because it holds passwords.ui.lang=en device.name=orion time.zone=Europe/Rome wifi.ssid=MyNetwork wifi.psk=my wifi passphrase ssh.password=a-long-root-password ssh.enabled=1 weather.city=Rome, Italy weather.lat=41.8919 weather.lon=12.5113 setup.done=1 # skip the on-screen wizard -
Boot
Insert the card and power on. You'll see the ORION ASCII logo and a progress bar. The first boot enlarges the data partition, which takes a few extra seconds. Then the setup wizard starts: calibrate touch by tapping the centre of each cross; the 4th cross checks the result.
-
Use it
Swipe left and right to move between apps. Tap the ORION logo on the home screen to open the assistant. To log in over SSH, set a root password and enable SSH in Settings › Device & SSH; the IP is shown in the System app. A serial console runs at 115200 baud on GPIO 14/15.
$ ssh root@<device-ip>
supported displays
None of these has been tested on real hardware yet. "Expected" means the kernel driver and pinout match the vendor's design.
| Board | Controller / touch | Profile | Status |
|---|---|---|---|
| Waveshare 3.5" RPi LCD (A) | ILI9486 + XPT2046 | tft35a | expected |
| Generic "3.5 inch RPi LCD" / MPI3501 / Kuman / Elegoo | ILI9486 + XPT2046 | tft35a | expected |
| OzzMaker PiScreen 3.5" | ILI9486 + XPT2046 | piscreen | expected |
| Adafruit PiTFT 3.5" resistive | HX8357D + STMPE610 | pitft35 | expected |
| Waveshare 3.5" (C) / MHS-3.5 | ILI9486 (high-speed) | tft35a | unverified |
| Waveshare 3.5" (B) IPS | ILI9486, different init | - | not yet |
| ILI9488 boards | ILI9488 (18-bit SPI) | - | not yet |
| HDMI monitor | firmware framebuffer | hdmi | expected |
SPI0 MOSI  GPIO10 (pin 19)    LCD CS    CE0 GPIO8  (pin 24)
SPI0 MISO  GPIO9  (pin 21)    TOUCH CS  CE1 GPIO7  (pin 26)
SPI0 SCLK  GPIO11 (pin 23)    LCD DC        GPIO24 (pin 18)
TOUCH IRQ  GPIO17 (pin 11)    LCD RESET     GPIO25 (pin 22)
faq
Does ORION AI send my data anywhere?
Can the Pi 2 run an LLM by itself?
llama-server on a PC on your network, used through the Local backend.The screen is white or garbled.
speed=16000000 in the managed block of config.txt. If your board isn't an ILI9486 type, check the compatibility table above.Touch is offset or mirrored.
How do I update?
/data (settings, Wi-Fi, history). Back it up first: ssh root@<ip> 'tar czf - -C /data .' > backup.tgz.I tested it on real hardware!
dmesg | grep -iE 'ili9486|ads7846|spi|drm'.